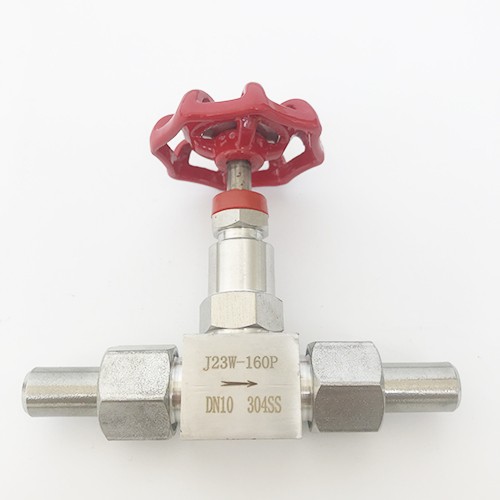
adjusting a water pressure reducing valve
Adjusting a Water Pressure Reducing Valve A Comprehensive Guide
Water pressure reducing valves (PRVs) are essential components in plumbing systems, especially in residential and commercial buildings. They help to regulate and lower the incoming water pressure to a safe and manageable level. High water pressure can lead to pipe damage, leaks, and increased wear on appliances, which is why it’s crucial to have a properly adjusted PRV. This article will guide you through the process of adjusting a water pressure reducing valve effectively.
Understanding Your Water Pressure Reducing Valve
A PRV is a valve that automatically reduces the high incoming water pressure to a lower, more consistent level. This is important for various plumbing appliances such as washing machines, dishwashers, and water heaters, which can be damaged by excessive pressure. Furthermore, reducing water pressure can help in conserving water and improving overall system efficiency.
Tools You Will Need
To adjust a PRV, you’ll need a few basic tools - A adjustable wrench or a pair of pliers - A pressure gauge - A flathead screwdriver (if applicable) - A towel or rag (for any spills)
Steps to Adjust the Water Pressure Reducing Valve
Step 1 Locate the PRV
The first step in adjusting your water pressure reducing valve is to locate it. PRVs are usually installed near the water main entry point of your home or building. The valve typically has a round adjustment screw on top or a nut that can be turned.
Step 2 Check the Current Water Pressure
Using a pressure gauge, attach it to a hose bib or faucet in your home to measure the current water pressure. Ideally, residential water pressure should be between 40 to 60 psi (pounds per square inch). If the pressure reading exceeds this range, it may indicate the need for an adjustment.
adjusting a water pressure reducing valve

Step 3 Adjust the Pressure
Once you have determined the current water pressure, you can proceed to adjust the PRV
1. Turn off the Water Supply Before making any adjustments, it's good practice to turn off the water supply to prevent any potential leaks or water splashes.
2. Make the Adjustment If your PRV has a screw, use a flathead screwdriver to turn it. Turning it clockwise will typically increase the pressure, while turning it counterclockwise will decrease it. If it has a nut, use your wrench to turn it in the same manner.
3. Adjust Gradually It is advisable to make small adjustments rather than drastic changes. Adjust in increments of about 1 to 2 psi, and then check the pressure again.
Step 4 Recheck the Water Pressure
After making your adjustments, turn the water supply back on and recheck the pressure using the gauge. Repeat the adjustment process if necessary until you achieve the desired pressure, typically in the range of 40 to 60 psi.
Step 5 Monitor for Leaks
After adjusting the valve, monitor the surrounding area for any leaks or signs of water escaping from the valve. If you notice any issues, it may be necessary to tighten connections or consult a professional plumber.
Conclusion
Adjusting a water pressure reducing valve is a straightforward process that can lead to significant improvements in your plumbing system’s overall performance. Regular monitoring and adjustment of your PRV can help prevent pipe damage and extend the life of your household appliances. If ever in doubt, do not hesitate to seek professional assistance to ensure your plumbing system operates efficiently and safely. By taking the time to adjust and maintain your PRV, you can enjoy the benefits of a consistent and manageable water pressure in your home.
-
The Key to Fluid Control: Exploring the Advantages of Ball Valves in Industrial SystemsNewsJul.09,2025
-
The Versatile World of 1, 2, and 3 Piece Ball ValvesNewsJul.09,2025
-
Stainless Steel Ball Valves: The Ideal Choice for Efficient Flow ControlNewsJul.09,2025
-
Optimizing Fluid Control with Ball Float ValvesNewsJul.09,2025
-
Manual Gate Valves: Essential for Control and EfficiencyNewsJul.09,2025
-
Everything You Need to Know About Butterfly ValvesNewsJul.09,2025
-
The Versatility of Wafer Type Butterfly ValvesNewsJul.08,2025


